3 Easy Steps to Make a Balloon Dinosaur Today
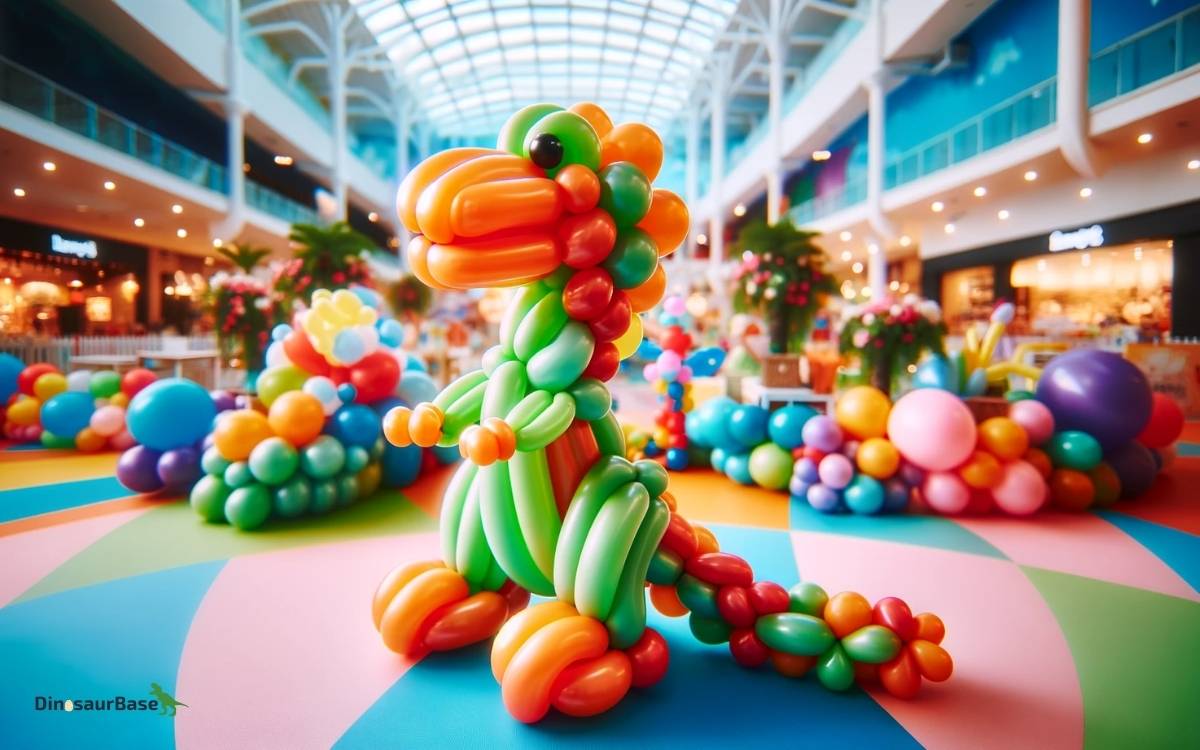
Create a balloon dinosaur by inflating long balloons, twisting them into basic shapes, and combining those shapes. Use vibrant colors and secure the joints firmly.
Crafting a balloon dinosaur is a fun and creative activity that instantly brings joy to kids’ parties, school events, or a rainy day at home.
With a few standard balloons and some simple twisting techniques, you can breathe life into a prehistoric creature that will delight dinosaur enthusiasts of all ages.
This engaging DIY project doesn’t require extensive balloon art experience or tools, making it accessible for beginners.
Brighten up any occasion with your self-made balloon behemoth, and watch as it becomes the centerpiece of playful imaginations.
Follow our guide to quickly transform ordinary balloons into a fantastical Jurassic creation that will roar to life in just minutes.

Gathering Your Supplies
Before crafting a delightful balloon dinosaur, gathering the right supplies is crucial. Crafting a sturdy and impressive dinosaur will be a breeze once you have everything in place. Let’s embark on the exciting journey by collecting the supplies needed for this fun activity!
Types Of Balloons Needed
Choosing the correct balloons is essential. You’ll need:
- Long balloons: Commonly known as twisting balloons, they’re perfect for creating dinosaur limbs.
- Round balloons: These will form the body and head of your dinosaur.
- Different colors: Pick vibrant colors like green, yellow, and red to give your dinosaur character!
Additional Tools And Accessories
With the balloons picked out, you need a few more items. Ensure you have:
- A balloon pump: Inflating balloons is much easier with a pump.
- Scissors: Useful for trimming any excess balloon parts.
- Markers: To draw eyes and mouth on your balloon dinosaur.
- Sticky tape or glue dots: They’ll help in attaching parts together without popping.
Step 1: Inflating The Balloons
Let’s embark on a fun-filled journey to create your very own balloon dinosaur! We start with the very foundation: inflating balloons. This first step sets the stage for a sturdy and impressive dino buddy.
Proper Inflation Techniques
Balloon dinosaurs require precision and care in their creation. Begin by choosing high-quality balloons designed for twisting and shaping. They must withstand pressure without popping. Here’s how to inflate them right:
- Use a balloon pump: This will help you inflate balloons easily and avoid lightheadedness.
- Leave space at the end: Do not fill the balloon to full capacity. Leave about a two-to-three-inch tail to allow for twisting.
- Check for consistency: Ensure your balloons have uniform air pressure for structural integrity.
Securing The Ends
After inflating, the next crucial step is to secure the balloon ends properly:
- Holding the balloon neck firmly, press the air down slightly.
- Loop the neck around your two fingers.
- Push the tip through the loop to tie a secure knot.
These knots prevent air from escaping and provide anchors for your dinosaur’s structure.
Step 2: Shaping The Dinosaur Structure
Now that you’ve gathered all your balloons, it’s time to dive into Step 2: Shaping the Dinosaur Structure.
This exciting stage involves turning a bunch of balloons into a prehistoric masterpiece. With a few twists and turns, your balloon collection will soon take on the shape of a mighty dinosaur. Let’s get started!
Creating The Dinosaur’s Body
Begin by inflating a long balloon, leaving about a four-inch uninflated tail. This will be the main structure of the body. Twist the balloon into three sections: a small 5-inch bubble for the neck, a 10-inch bubble for the body, and another 5-inch bubble to form the back.
Connect the neck and back by twisting them together. This creates the basic shape of the dinosaur’s body.
Forming Legs And Tail
- Inflate two small balloons for the legs. Each should have a small amount of uninflated tail left.
- Twist each balloon into four equally-sized bubbles.
- Lock the first and last bubbles together to create a loop – these are the legs.
- Attach the legs to the body by wrapping them around the intersection of the neck and back.
- For the tail, use the remaining uninflated portion of the body balloon and give it a slight curve.
Crafting The Dinosaur’s Head
- Inflate a small balloon for the head. Leave a 3-inch tail.
- Create a small bubble for the nose followed by a larger bubble for the head.
- Twist these two bubbles together a couple of times to secure them.
- Attach the head to the neck bubble on the body structure.
- Add a tiny bubble at the end of the head balloon for the tail.
Your balloon dinosaur has taken shape! It may take a little practice, but each step brings fun and learning.
Step 3: Adding Details And Features
Your balloon dinosaur has its shape, but it’s not quite prehistoric yet. Step 3 is where the magic happens. You’ll turn a simple balloon into a dinosaur with personality. Let’s add those vital details and features to bring your creation to life!
Color Patterns and Markings
Color Patterns And Markings
Colors make everything fun, especially for dinosaurs. Using markers or paint, let’s add some wild designs. Stripes or spots give your dinosaur a unique look. Choose bright colors; dinosaurs were not boring!
- Start with the back. Draw a line along the spine.
- Add spots or stripes down the sides.
- Use different colors for a vibrant effect.
Installing Eyes and Teeth
Installing Eyes And Teeth
Eyes and teeth give your dinosaur character. For eyes, stick-on googly eyes work perfectly. If you don’t have them, black and white markers will do the trick. Teeth can be white paper triangles glued inside the mouth.
- Place the eyes near the top of the head.
- Glue the teeth around the mouth opening.
- Make sure they’re evenly spaced to look real.
Visual Aid Table
| Feature | Material | How To Apply |
|---|---|---|
| Color Patterns | Markers/Paint | Draw on Balloon |
| Eyes | Googly/Sticker | Stick on Head |
| Teeth | Paper | Glue in Mouth |
This is where your dinosaur truly comes to life. Take time adding these details for a roaring result! Your balloon dinosaur is now ready for adventure. Share it with friends and enjoy your dino-mite creation!
Presentation And Maintenance Tips
Your handmade balloon dinosaur deserves the spotlight. Whether it’s for a birthday party or as a fun decoration, a few presentation and maintenance tips can keep your creation looking great. Follow these simple guidelines to ensure your balloon dino steals the show and stays inflated longer!
Display Suggestions
Display Suggestions
Show off your balloon dinosaur with pride! Choose a spot where everyone can admire it. Keep it away from sharp objects and heat sources to avoid pops or melting.
- Use a backdrop in a solid color to make it stand out.
- Place it at eye level so kids can see it without touching.
- Add lighting, like spotlights, for extra drama.
Keeping Your Balloon Dinosaur Inflated
Keeping Your Balloon Dinosaur Inflated
Balloons lose air over time, but you can slow the process. Ensure your dino stays plump and happy with these tricks:
- Avoid direct sunlight as heat can cause deflation.
- Use high-quality balloons that hold air better.
- Store in a cool, dry place before the big reveal.
Frequently Asked Questions Of 3 Easy Steps To Make A Balloon Dinosaur Today
How Do You Make A Simple Balloon Dinosaur?
To create a simple balloon dinosaur, start by inflating a long balloon, leaving about a 4-inch tail. Twist three small bubbles for the head and neck, followed by four larger bubbles for legs. Fold and lock twists for stability, then adjust for a standing position.
How Do You Make A Simple Balloon Dragon?
To make a simple balloon dragon, inflate a long balloon leaving a 6-inch tail. Twist a series of small and large bubbles to form the head, neck, body, legs, and tail. Secure each part by twisting the balloon upon itself.
Finish with a sharpie for eyes and details.
How Do You Make A Simple Balloon Dog?
To make a simple balloon dog, inflate a long balloon leaving a 3-inch tail. Start at the tied end, twist three segments for the ears and head. Twist three more segments for the front legs. Finally, twist three segments for the back legs.
Secure by tucking and twisting the joints.
How Do You Draw A Simple Balloon Animal?
To make a simple balloon animal, inflate a long balloon leaving a 3-inch tail. Twist three basic balloon bubbles for the head and ears. Lock the first and third twists together forming the face. Twist segments for the neck, legs, and body, securing each section with twists.
Conclusion
Crafting a balloon dinosaur is simpler than you might think. Follow the outlined steps to spark creativity and joy at your next event. You’re now equipped to dazzle with these prehistoric wonders. So, grab some balloons, and let the fun begin—delight awaits with every twist and turn.


