10 Steps to Make Your Own Dinosaur Puppet Easily
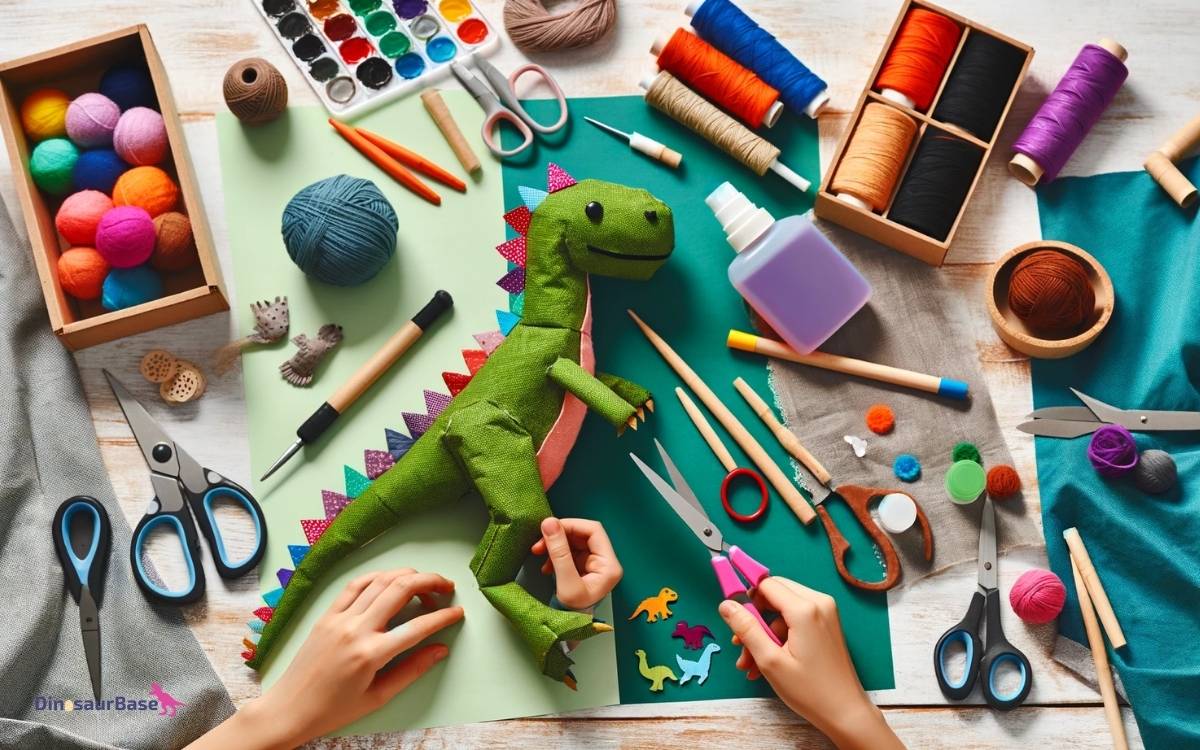
To create your own dinosaur puppet, gather materials and follow a simple 10-step process. Start by designing the dinosaur’s features for a personalized touch.
Crafting a dinosaur puppet at home can be a delightful project for hobbyists or a fun, engaging activity for parents and children to enjoy together.
This hands-on task encourages creativity, offers a personalized entertainment option, and can even serve as an educational tool to learn about these prehistoric creatures.
Using readily available materials such as felt, glue, scissors, and some imagination, anyone can produce a playful and customized dinosaur companion.
This guide will take you through the essential steps from conceptualization to the final product, ensuring your puppet-making experience is both enjoyable and successful.
Keep the process simple and enjoy the opportunity to bring a little piece of the Jurassic era into the modern world.

Why Create A Dinosaur Puppet?
Why Create a Dinosaur Puppet?
Imagine your very own prehistoric buddy, crafted by your hands. A dinosaur puppet stirs excitement and creativity. It’s not only fun but educational.
Whether you’re a parent, teacher, or kid at heart, this project promises to roar to life. With simple materials, you can embark on an adventure back in time. See how below!
Igniting Imagination
Let’s dive into a world where dinosaurs roam. Crafting a dinosaur puppet does more than entertain. It unlocks a child’s creative potential.
Imagination is the key to innovation and problem-solving. Children invent stories and characters, developing their narrative abilities. Visualizing a T-Rex or a gentle Brontosaurus engages kids in artistic expression.
Educational Tool For Children
Dinosaur puppets turn playtime into a learning experience. Young minds discover ancient creatures through tactile play. They learn about species, habitats, and the natural history that shaped our world.
Colors, shapes, and movement with puppets boost cognitive development. It’s learning disguised as play, which is the best way to teach!
Materials You’ll Need
Ready to bring a prehistoric creature to life? Crafting a dinosaur puppet requires specific materials. Gather them before starting, to ensure a smooth and fun creation process!
Choosing Fabrics
Choosing the right fabric will make your dinosaur puppet feel real! Look for colors that pop. You’ll want something soft and easy to manipulate for your dino’s skin.
- Felt: A perfect choice for vivid colors and durability.
- Fleece: Soft and comfy, great for a cuddly dino.
- Velvet or Velour: Adds a unique texture for a more lifelike look.
Essential Tools And Supplies
Tools and supplies are the backbone of puppet making. Here’s what you need:
- Scissors: Sharp and precise for cutting fabric.
- Needle and Thread: To stitch your puppet into shape!
- Hot Glue Gun: Quick and reliable for adding details.
- Buttons or Googly Eyes: For seeing into the dino-world!
- Pipe Cleaners: The secret to a flexible dino spine!
Organize your workspace with all these materials. Doing so creates the path to crafting a dino pal your kid will adore!
Designing Your Dinosaur
Get ready to bring the ancient world back to life as you design your very own dinosaur puppet!
Crafting these prehistoric pals is not only tons of fun but also unleashes your creativity. So sharpen your pencils, and let’s start making a dino-friend with personality!
Sketching The Concept
Begin with imagining your dinosaur. What kind does it belong to? A mighty T-Rex, a graceful Brachiosaurus, or perhaps a clever Velociraptor? Once you’ve decided, grab your sketchpad. Draw the shape and posture.
Outline the head, body, arms, and legs. Before moving on, make sure you’re happy with your drawing.
Selecting Dino Features
Next, focus on the details that make your dinosaur unique. Think about its skin texture, colors, and patterns.
Do you see any spikes or plates? How about its teeth and eyes? Choose features that will make your puppet stand out.
Here’s a simple list to guide you:
- Skin Texture: Smooth like a snake or rough like a crocodile?
- Colors: Natural greens and browns or vibrant reds and blues?
- Patterns: Stripes, spots, or a mix of both?
- Spikes and Plates: Sharply pointed or more rounded?
- Teeth: Long and sharp or short and blunt?
- Eyes: Big and expressive or small with a fierce gaze?
Remember, each choice brings your dinosaur puppet to life. So take your time, and have fun with this creative process!

Credit: www.pinterest.com
Crafting The Puppet’s Body
Embark on a prehistoric crafting adventure! Constructing your own dinosaur puppet begins with shaping its very core – the body. Follow these straightforward steps to transform simple fabric into a dino companion.
We will cover the essentials: cutting the fabric with precision and sewing the pieces into a friendly prehistoric puppet.
Cutting The Fabric
Creating the perfect shape for your dino buddy is all about the cut. Begin by choosing a soft fabric like fleece or felt. These materials are not only comfortable but also easy to work with.
Here’s how to cut the fabric:
- Select a vibrant color to bring your puppet to life.
- Place the dinosaur pattern on the fabric.
- Secure the pattern with pins to avoid slipping.
- With sharp scissors, cut along the pattern lines.
- Remember to include a seam allowance for stitching.
Sewing the Pieces Together
Sewing The Pieces Together
The real magic happens when the pieces unite! It’s time to sew your dinosaur into existence. Fear not if you’re new to sewing; this step is surprisingly simple and fun.
Below is the sewing process:
- Thread the needle with a strong, matching thread.
- Align the fabric pieces with their right sides together.
- Give space for the puppet’s mouth and leave an opening for the hand.
- Stitch slowly around the edges for a neat seam.
- Use backstitching for extra strength on corners.
- Trim any excess threads and turn the puppet right side out.
Your dinosaur’s body is taking shape! You’re now ready to add personality and charm in the next steps. Let’s continue crafting a prehistoric pal that’s uniquely yours!
Creating Moveable Joints
Creating Moveable Joints breathes life into your dinosaur puppet. Imagine your dino waving its arms and chomping with realism! It’s essential for an interactive play experience.
To achieve this, we’ll focus on making hinges and installing elastic bands that allow for smooth motion.
Making Hinges
To start with hinges, they form the backbone of your dinosaur’s moveable parts. These simple yet crucial elements allow your puppet’s limbs to bend and rotate. Crafting them isn’t rocket science!
- Pick sturdy yet flexible materials like cardboard or thick foam sheets.
- Cut into shapes that match the parts they’ll connect.
- Position your hinge at the joint. Secure it with tape or glue for movement.
Pro tip: Test your hinge’s movement before fixing it permanently to ensure a smooth range of motion.
Installing Elastic Bands
Elastic bands give puppets a snappy, responsive action. They’re the secret to making your dinosaur puppet’s joints return to place after each movement.
- Get varied sizes of elastic bands to suit different joint sizes.
- Attach the band to one side of the joint.
- Stretch it across to the opposite side to create tension.
Ensure the tension is just right; too tight, and the joint won’t bend easily. Too loose, and the joint won’t return to its original position.
Remember: Each joint’s flexibility adds depth to your dinosaur’s personality. Have fun experimenting with different tensions to capture the essence of your prehistoric friend!
Assembling The Head
Create an impressive dinosaur head with these easy steps. Craft a jaw, attach piercing eyes, and fierce teeth to bring your puppet to life.
Molding The Jaw
Begin with a strong base for your dinosaur’s mouth:
- Cut foam into two pieces for the upper and lower jaws.
- Shape each piece to form a curved jawline.
- Glue the edges together to form a hinged jaw.
- Let it dry.
Attaching Eyes And Teeth
Add character and ferocity with eyes and teeth:
- Select plastic eyes for a lifelike look.
- Position the eyes on the puppet’s face.
- Glue them in place securely.
- Use white foam for sharp teeth.
- Cut the foam into triangles.
- Attach inside the mouth with strong craft glue.
Painting And Texturing
Bringing your dinosaur puppet to life involves not just assembly, but also the magic of painting and texturing.
Imagine a realistic mini-dinosaur right in your hands! With a few simple steps, achieve a look that can transport you straight to the Jurassic era. Dive into a world of colors and textures that will make your dinosaur puppet stand out.
Choosing Colors
Start by selecting a color palette that mirrors the great lizards of the past. Go for greens, browns, or greys as your base. These earthy tones provide a natural look.
Dinosaurs come in many shapes and sizes; their colors were just as varied. Use images of your favorite dinosaurs for inspiration.
- Earthy tones: Greens, browns, and greys.
- Brighter colors: Consider reds or yellows for a vibrant touch.
- Patterns: Stripes or spots can add character.
Adding Realistic Touches
To give your puppet depth and dimension, start with a dark shade on the creases. Add lighter colors on the raised areas.
This creates shadows and highlights, mimicking natural musculature. Think about where your dinosaur might have wrinkles or scales.
Use a sponge or stiff brush to dab on textures. Make use of:
| Tool | Texture Effect |
|---|---|
| Sponge | Soft, varied patterns |
| Stiff Brush | Small, detailed marks |
| Fingertips | Smudges and sweeps |
Mix colors for uniqueness. Apply a final layer of paint for sheen and protection. Your dinosaur puppet will soon have texture and character. Let kids help with texturing. Their creative touch can add unexpected and delightful details!
Adding Final Touches
Now that your dinosaur puppet has shape and character, it’s time for those crucial final touches. This stage brings your creation to life, infusing it with personality and ensuring it’s ready for action. Let’s dive into the details and add those finishing touches!
Install Inner Lining
Creating a comfortable home for your hand inside the puppet is essential. Insert a soft fabric as the inner lining. This not only makes the puppet comfortable to wear but also adds to its durability.
Choose a fabric that feels good against your skin – fleece or cotton are excellent choices. Cut the fabric to fit inside the puppet’s body, then use fabric glue or hand-stitch it into place.
Testing Puppet Mobility
Now, let’s ensure your dinosaur can move as real ones once did. Test the mobility by moving the puppet’s mouth, tail, and limbs.
Each part should move smoothly. If you encounter any stiffness, adjust the joints or add some padding. Remember, a dinosaur puppet that can’t chase its prey is no fun!
| Part | Action | Check For |
|---|---|---|
| Mouth | Open/Close | Smoothness |
| Tail | Swing | Flexibility |
| Limbs | Move | Range of Motion |
- If needed, trim any excess material inside the puppet that restricts movement.
- Test different hand positions for optimal performance.
Practice makes perfect! Spend time mastering the puppet’s motions. Your hand movements bring the dinosaur puppet to life!
Performing With Your Dinosaur Puppet
Once you’ve crafted your dinosaur puppet, it’s showtime! Animating your prehistoric pal breathes life into your creation.
Prepare to captivate your audience with dynamic movements and a roaring character voice. Let’s dive into the world of puppetry performance with a couple of essential steps!
Mastering Puppetry Skills
Bringing your dinosaur puppet to life requires practice. Here are some tips to hone your skills:
- Movement is key: Start with basic up-and-down motions. Gradually incorporate head tilts and side-to-side movements.
- Express with silence: Your puppet can convey many emotions. Practice using pauses and slow movements to show thoughtfulness or excitement.
- Eye contact is crucial: Make sure your puppet looks at the audience when speaking. This builds a connection with the viewers.
- Mirroring your puppet: If your dinosaur is sad, slouch a little. If it’s happy, make its movements bouncy and light.
Regular practice in front of a mirror speeds up your learning. Remember, patience and persistence make a master puppeteer!
Creating A Dinosaur Voice
Your dinosaur’s voice gives it personality. Consider these tips to develop a unique sound:
| Aspect | Details |
|---|---|
| Pitch | Experiment with high and low pitches to match your dinosaur’s size. |
| Texture | Use growls or smooth tones to create a texture that fits the puppet. |
| Language | Decide if your dinosaur speaks, roars, or uses a made-up dino language. |
| Emotion | Change the voice’s intensity with different emotions like anger or joy. |
Record and listen to your voice. Adjust until it feels just right. Surprise your audience with an unforgettable dinosaur character!
Maintenance And Storage
Owning a dinosaur puppet brings joy and endless adventures. But like all toys, it needs care to last. Here’s how to keep your dino buddy in top shape.
Cleaning Your Puppet
Dirt can make your puppet look old. Regular cleaning keeps it looking new. Use these steps:
- Get a soft, damp cloth.
- Gently wipe the puppet’s surface.
- For tougher stains, use mild soap with water.
- Rinse with a clean cloth.
- Let it air dry – no direct sunlight.
Remember, gentle cleaning is key. Never use harsh chemicals on your puppet.
Proper Storage Practices
Your puppet loves adventures but needs rest. Proper storage keeps it safe and sound. Follow these tips:
- Choose a cool, dry place.
- Avoid cramped spaces. Your puppet needs room.
- Keep it away from pets and tiny hands.
- If possible, use a sealed container.
- Store it away from direct sunlight.
These easy steps ensure your puppet stays perfect for years. Care for your puppet, and it will keep roaring for more fun!
Frequently Asked Questions Of 10 Steps To Make Your Own Dinosaur Puppet Easily
How To Make A Dinosaur Puppet?
Begin by choosing your materials, like felt, glue, and scissors. Cut out the dinosaur shape from the felt. Glue the pieces together to form a puppet body. Add details like eyes and teeth. Let it dry, and your dinosaur puppet is ready for playtime!
How Do You Make A Puppet Step By Step?
Select a puppet style and gather materials such as fabric, yarn, and foam. Cut out the puppet’s body and sew it together. Attach limbs and sew on facial features. Add yarn for hair, and personalize with clothes or accessories. Finish by inserting a hand hole for puppeteering.
What Materials Are Needed For A Diy Dinosaur Puppet?
To make your own dinosaur puppet, you will need felt or fabric, scissors, glue, a template, and optional decorations such as googly eyes or yarn. These materials are easily accessible and affordable.
How Long Does It Take To Create A Dinosaur Puppet?
Creating a dinosaur puppet can take anywhere from 30 minutes to 2 hours. It depends on the complexity of the design and the individual’s crafting speed. Simple designs can be completed quickly.
Conclusion
Crafting your dinosaur puppet is a creative adventure, made simple with these steps. Enjoy the process and watch your very own prehistoric pal come to life. It’s a perfect weekend project, one that will delight both kids and adults alike.


